How to set up HTTP(S) Proxy on Firefox
In this tutorial we will show you how to set up HTTP(S) Proxy on Firefox but first let’s see what are our requirements.
Requirements
In order to set up the HTTP(S) Proxy on Firefox you will need:
- A CactusVPN account. If you don’t have one you can try our services for free.
- Your Proxy username, password and Proxy server address. You can find them in your account on our website, by going to Settings.
Recommendations
To skip the manual setup we recommend to use the CactusVPN Extension for Firefox.
Go step-by-step through following instructions:
-
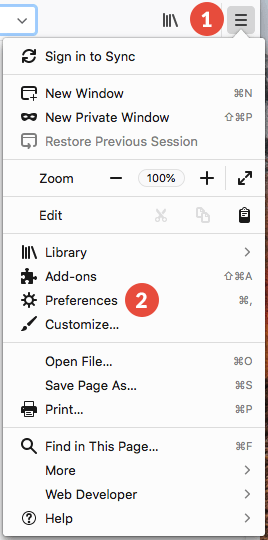
In Firefox browser go to the menu (1) and click on Preferences (on macOS) or Options (on Windows) (2).
-
Search for Proxy using the Search bar (3) (or you can scroll down to Network Proxy) and click on Settings… (4).

-
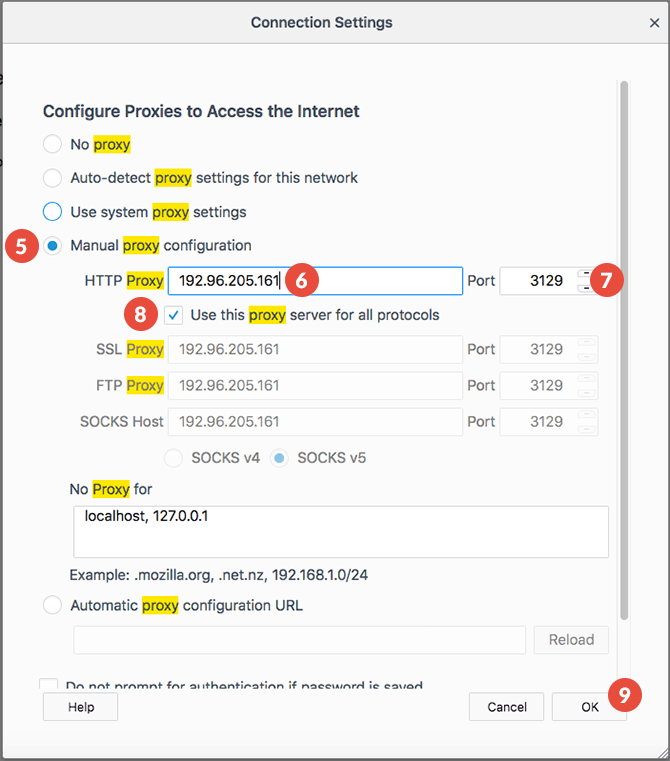
Check the Manual proxy configuration checkbox (5).
In the HTTP Proxy field (6) type the IP address of a CactusVPN server.
In the Port field (7) type the port number supported by CactusVPN.
You can find IP addresses of all our servers in your account on our website, by going to Settings.
Also check the Use this proxy for all protocols checkbox (8).
Click OK (9).
-
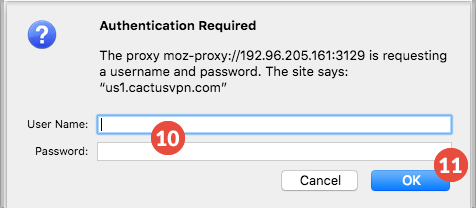
The first time you’ll try to visit a website, a window will appear asking for an username and a password (10).
Type your VPN username and password.
You can find your VPN username and password in your account on our website, by going to Settings -> VPN Username & Password. Make sure you use your VPN username and password and NOT the website account credentials (What is the difference?).
Click on OK (11).
That’s all. Now you can browse safely and anonymous.
Popular tutorials like this
VPN and Smart DNS Services
Protect online privacy, secure your connection and access blocked websites
Try CactusVPN For Free