How to add exclusions for Windows Defender Firewall in Windows 7
Follow this step-by-step tutorial to add exclusions for Windows Defender Firewall in Windows 7.
-
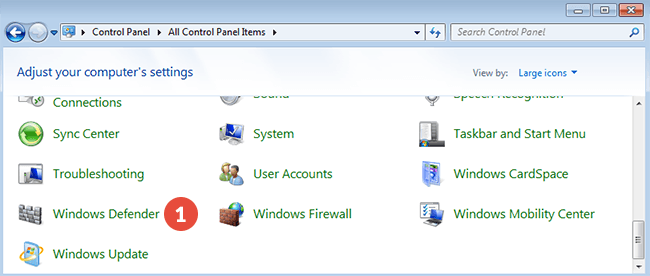
Open the Control Panel (icons view) and click on “Windows Defender” (1).
-
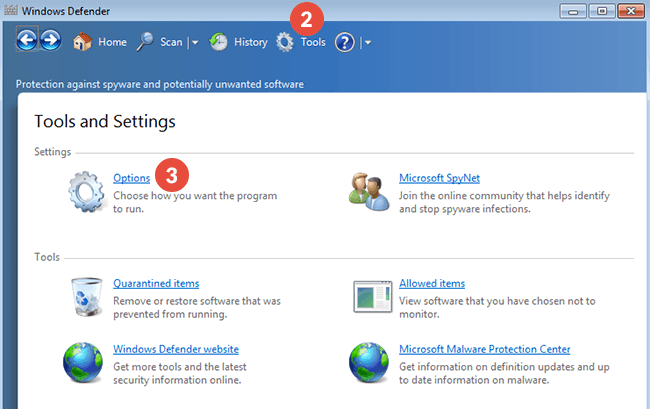
Click on “Tools” (2) and then on “Options” (3).
-
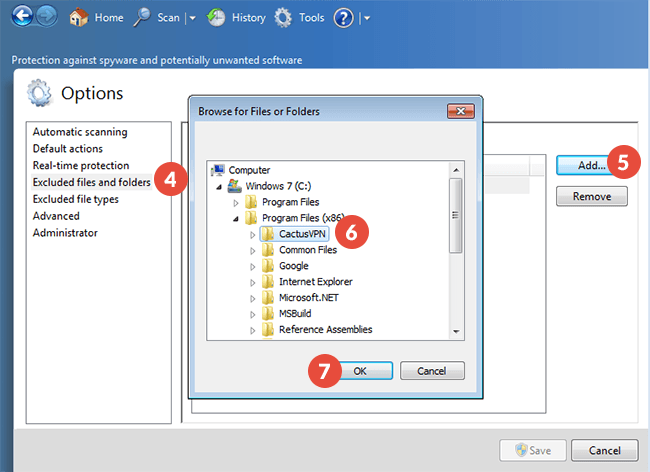
Click on “Excluded Files and Folders” (4).
Click on “Add” (5).
Select the CactusVPN folder (6) (by default it should be located in C:\Program Files (x86)\CactusVPN).
Click “OK” (7) to add it to the list.
-
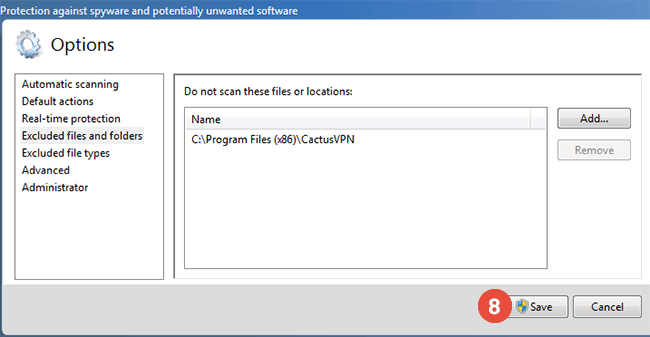
Click on “Save” (8).
-
Select “Real-time protection” from the left column, check to re-enable “Use real-time protection”, save the change and exit.
Popular tutorials like this
VPN and Smart DNS Services
Protect online privacy, secure your connection and access blocked websites
Try CactusVPN For Free