How to exclude files from scanning in F-Secure Antivirus
Follow this step-by-step tutorial to exclude files from scanning in F-Secure Antivirus.
-
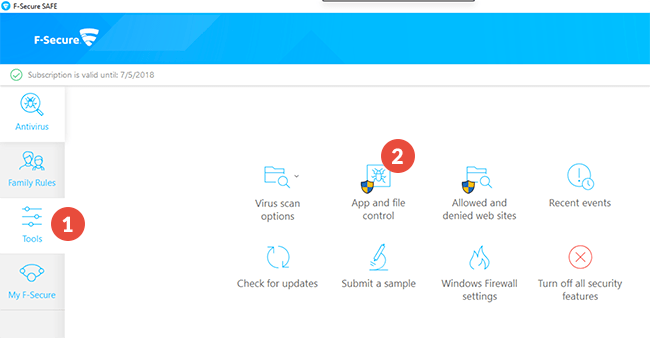
Open F-Secure Antivirus, go to “Tools” (1) and click on “App and file control” (2).
-
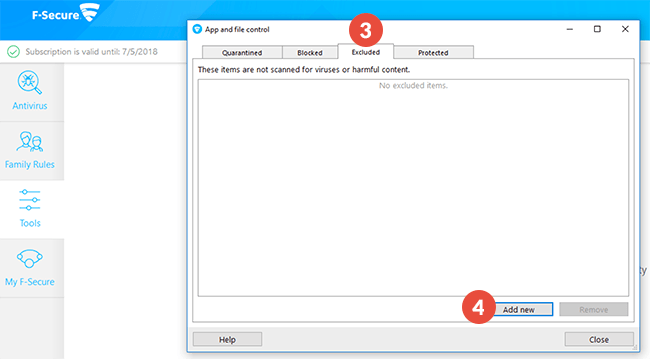
Select the “Excluded” tab (3) and click on “Add new” (4).
-
Select the folder where the CactusVPN app is installed (5) and click “OK” (6).
On Windows computers, by default it should be here:
“C:\Program Files (x86)\CactusVPN\”.On Mac computer, by default it should be here:
“/Applications/CactusVPN.app/Contents/MacOS/CactusVPN/”.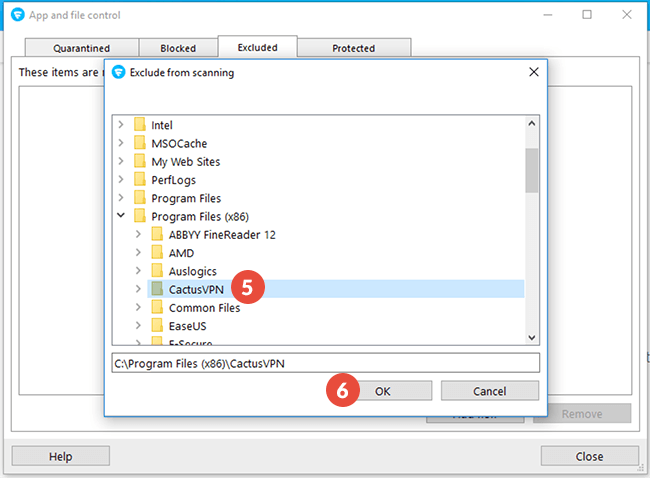
-
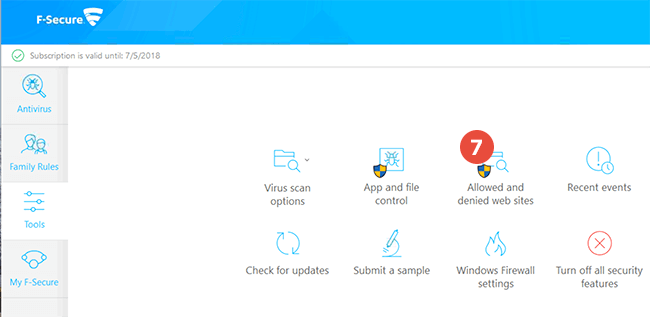
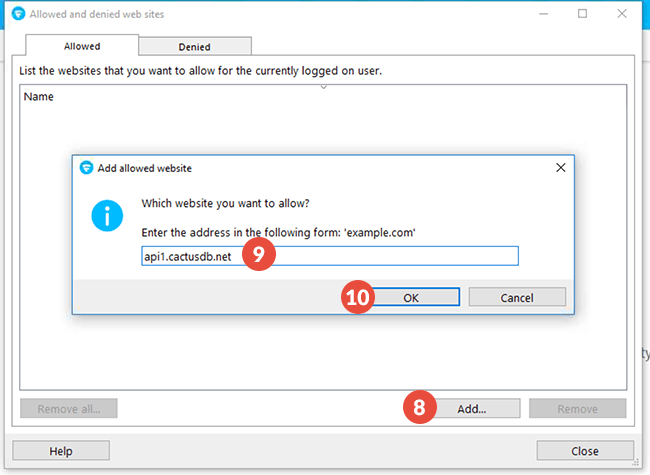
Go to “Tools” and click on “Allowed and denied web sites” (7).
-
Click on “Add…” (8).
Type https://api1.cactusdb.net in the field (9) and click on “OK” (10).
Repeat the same prcedure to add https://api2.cactusdb.net.
-
Close the F-Secure and restart your device for changes to take effect.
Popular tutorials like this
VPN and Smart DNS Services
Protect online privacy, secure your connection and access blocked websites
Try CactusVPN For Free