How to set up WireGuard VPN on Ubuntu
In this tutorial we will show you how to set up WireGuard® VPN on Ubuntu but first let’s see what are our requirements and recommendations.
Requirements
In order to set up WireGuard you will need a CactusVPN account. If you don’t have one you can try our services for free.
Generate the WireGuard configuration
-
Sign in to your account on our website and go to Settings -> WireGuard Configs.
-
Select the VPN server you want to connect to.
In the field below, you will get the Wireguard configuration for the selected server. Copy the content of the field, you will need it later.
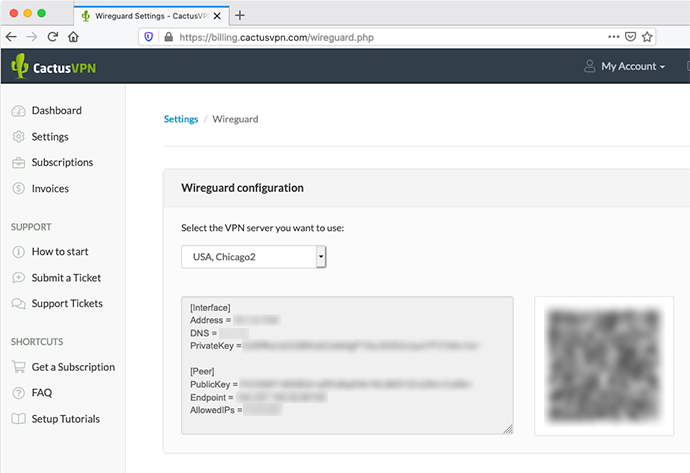
Important! Keep the PrivateKey a closely guarded secret, do not share it with anyone, and do not post it on the Internet.
Install WireGuard
Open the Terminal app by pressing Ctrl + Alt + T.
If you are using Ubuntu 20, run following commands to install WireGuard:
-
Run:
sudo su
then enter your password.
-
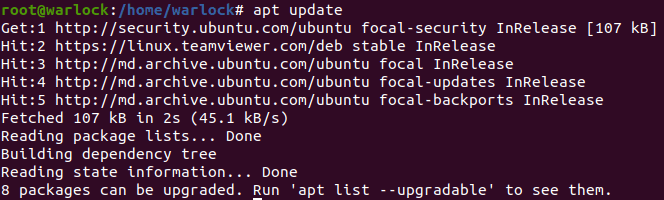
Then run:
apt update
Note! The results might differ. This is how a successful update looks like:
-
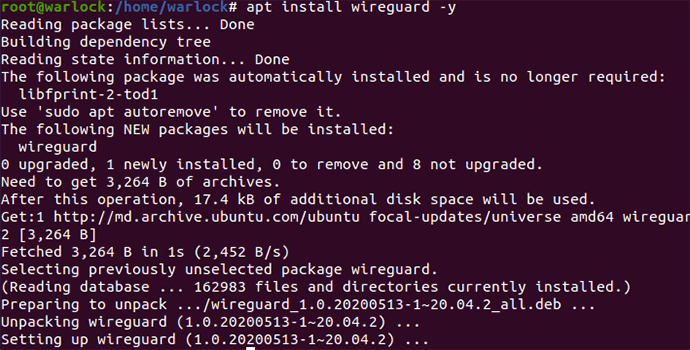
Run:
apt install wireguard -y
If you are using Ubuntu 18 or earlier, run following commands to install WireGuard:
add-apt-repository ppa:wireguard/wireguard
apt update
apt install wireguard
Configure WireGuard
-
Go to the /etc/wireguard folder:
Run:
cd /etc/wireguard/
-
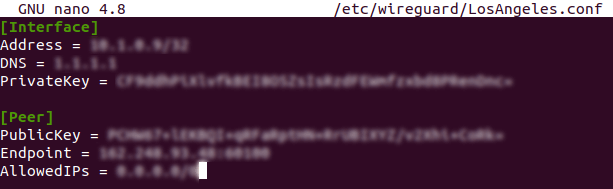
Create the [ServerName].conf file. Replace [ServerName] with the name of the CactusVPN server you want to use. For example, LosAngeles.cof:
Run:
nano /etc/wireguard/LosAngeles.conf
-
Paste into the [ServerName].conf file the WireGuard configuration generated earlier in your account on our website.
-
Press Ctrl + o then press Enter to save the file.
Press Ctrl + x to close the file.
Connect to VPN
Start the WireGuard interface:
systemctl start wg-quick@LosAngeles
NOTE: If the connection fails and when running the systemctl status wg-quick@LosAngeles command you get the result /usr/bin/wg-quick: line 32: resolvconf: command not found, you have to create a symbolic link to the resolvectl file by running:
ln -s /usr/bin/resolvectl /usr/local/bin/resolvconf
Then try again to start the Wireguard interface.
To disconnect:
systemctl stop wg-quick@LosAngeles
To check your external IP address:
apt update && apt install curl
curl ifconfig.io
To see the connection status:
systemctl status wg-quick@LosAngeles
“WireGuard” is a registered trademark of Jason A. Donenfeld.
VPN and Smart DNS Services
Protect online privacy, secure your connection and access blocked websites
Try CactusVPN For Free