Smart DNS Setup Tutorial
In this tutorial we will show you how to set up Smart DNS but first let’s see what are our requirements and recommendations.
Requirements
In order to set up the Smart DNS you will need:
- A CactusVPN account. If you don’t have one you can try our services for free.
- Your DNS addresses. You can find them in Settings -> DNS Servers in Your Account our website.
If you still want to set up Smart DNS manually, go step-by-step through following instructions:
Part I. Validate Your IP Address
If you have already validated your IP address go straight to the “Part II. Change your DNS addresses” of this tutorial.
- Sign in to your account on our website and go to Settings -> Validate Your IP Address.
- Click on Validate IP button.
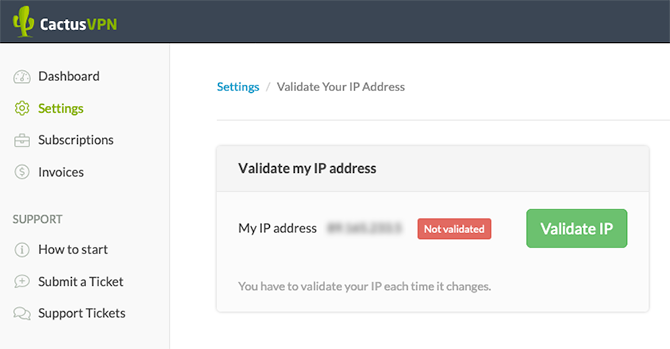
If you see the “Validated” green label near your IP address, go straight to the “Part II. Change your Windows DNS addresses” of this tutorial
Remember! You have to validate your IP address each time it changes. If your Smart DNS service is not working, just try to validate your IP address again.
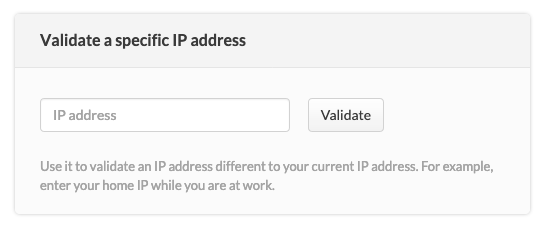
You also have other two options to validate an IP address:
Validate a specific IP address
Use this option when you need to validate an IP address different to your current IP address. For example, enter your home IP while you are at work.
Validate IP using a web address
Using this method you do not have to sign in to your account each time you need to validate the IP. Add this link to your browser favorites/bookmarks and your IP address will be validated every time you load this URL into your browser.
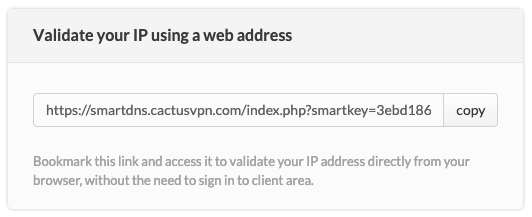
Important! Do not share this link! It is unique for every CactusVPN user. If you share it, other people will have access to your Smart DNS service and you will not be able to use it.
Part II. Change your DNS addresses
This has to be done only once.
- Go to the network settings of your device and find where you can add/change DNS addresses.
- Enter CactusVPN DNS addresses. You can find them in Settings -> DNS Servers in Your Account on our website.
- Save the changes and restart your device.
That’s all!
Popular tutorials like this
VPN and Smart DNS Services
Protect online privacy, secure your connection and access blocked websites
Try CactusVPN For Free