How to bypass transparent DNS proxy
Some ISPs use Transparent DNS Proxy technology to intercept DNS lookup requests (TCP/UDP port 53) and transparently proxy to their DNS servers. This forces your computer or router to use their DNS service for all DNS lookups instead of the ones you’ve set up. In this case Smart DNS technology wouldn’t normally work but we have a solution for this.
If you have a DD-WRT or Linux based router we can help you bypass your ISP’s Transparent DNS proxy using custom firewall rules and our DNS servers which runs on different TCP/UDP port.
Here is how you can do this:
-
Go to My Account (1) on CactusVPN website and sign in.
-
Go to Settings -> Bypass Transparent DNS Proxy.
-
Click on the Open script in a new tab link (4) and copy all the text from the opened page.
-
Log in to your router and go to Setup -> Basic Setup (5).

-
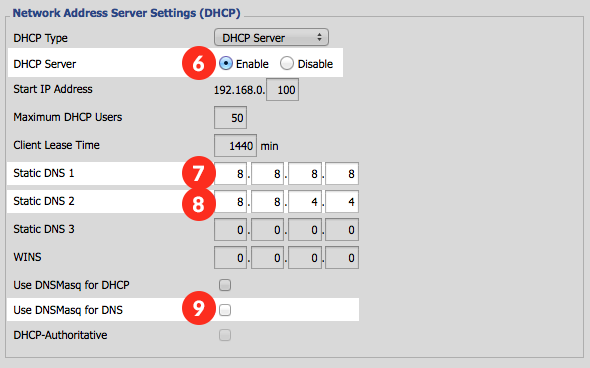
Go to Network Address Server Settings (DHCP) and tick the Enable checkbox (6) from DHCP Server.
Change Static DNS 1 (7) to: 8.8.8.8
Change Static DNS 2 (8) to: 8.8.4.4
Disable Use DNSMasq for DNS (9).
Click on Apply Settings button.
-
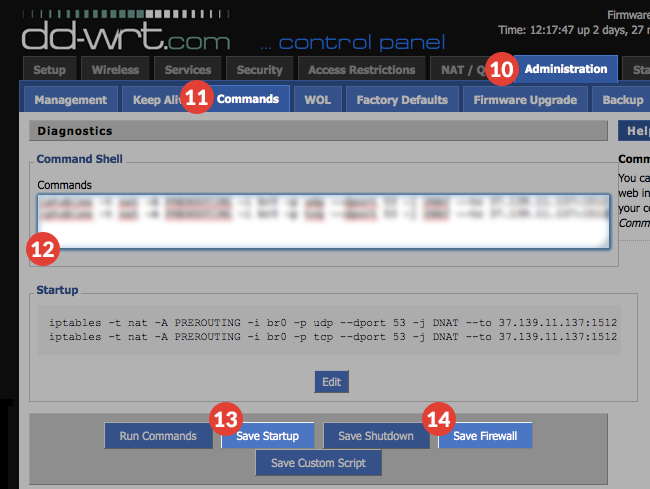
Go to Administration (10) -> Commands (11) from your router’s menu and paste (12) the code that you copied previously from Bypass transparent DNS proxy script page.
Hit the Save Startup button (13).
Now paste again the code and click on Save Firewall (14).
That is all! You can now connect your devices and use our Smart DNS service.
Popular tutorials like this
VPN and Smart DNS Services
Protect online privacy, secure your connection and access blocked websites
Try CactusVPN For Free