How to set up VPN on Tomato Routers
In this tutorial we will show you how to set up VPN on Tomato Routers but first let’s see what are our requirements and recommendations.
Requirements
In order to set up the VPN you will need:
- A CactusVPN account. If you don’t have one you can try our services for free.
- Your VPN username, password and VPN server address. You can find them in your account on our website, by going to Settings.
If you still want to set up VPN manually, go step-by-step through following instructions:
VPN Setup instructions
- To start set up VPN on Tomato routers you first have to connect to it. For that you have to put in your browser the following address: http://192.168.1.1 (If this doesn’t work, please consult your router’s manual to find what is the Default Gateway Address). Also you have to set your network connection to obtain IP address automatically if you connect to your router via Ethernet.
- Choose “Basic”, “Network” (1).Choose PPTP / L2TP from the “Type” drop-down menu (2).
Important! By setting up a L2TP VPN on Tomato routers your IP will be changed but your traffic will NOT be encrypted. That happens because the connection does not use IPSec.
Enter your VPN username and password (3). You can find them in your account on our website, by going to Settings. Make sure you use your VPN username and password and NOT the website account credentials (What is the difference?).
Check the “Use DHCP” and “Use Deafault Gateway on Remote Networ” checkboxes (4).
Enter the IP address of the VPN server you want to connect to in the “PPTP Gateway” / “L2TP Server” field (5). You can find all the available servers in your account on our website, by going to Settings.
Enter the Public Google DNS or other open DNS addresses in the “Static DNS” fields (6).
Check the “DHCP server” checkbox (7).
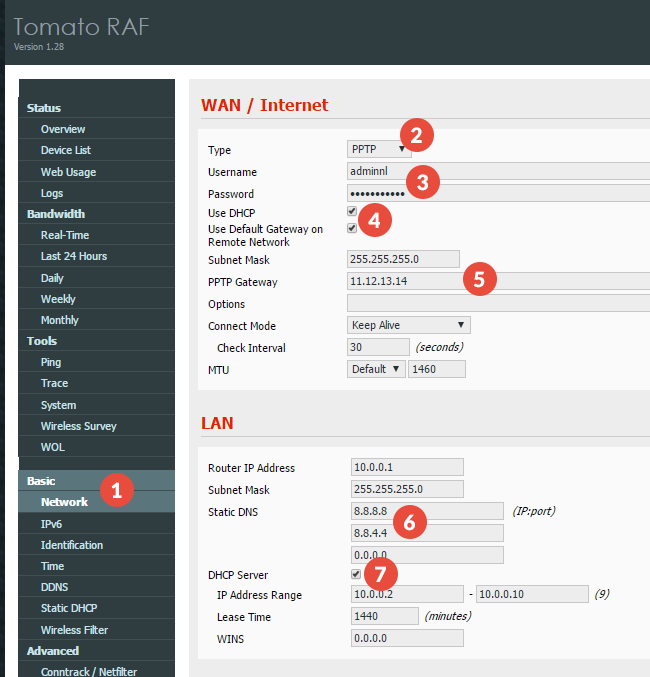
Scroll down and save the changes.
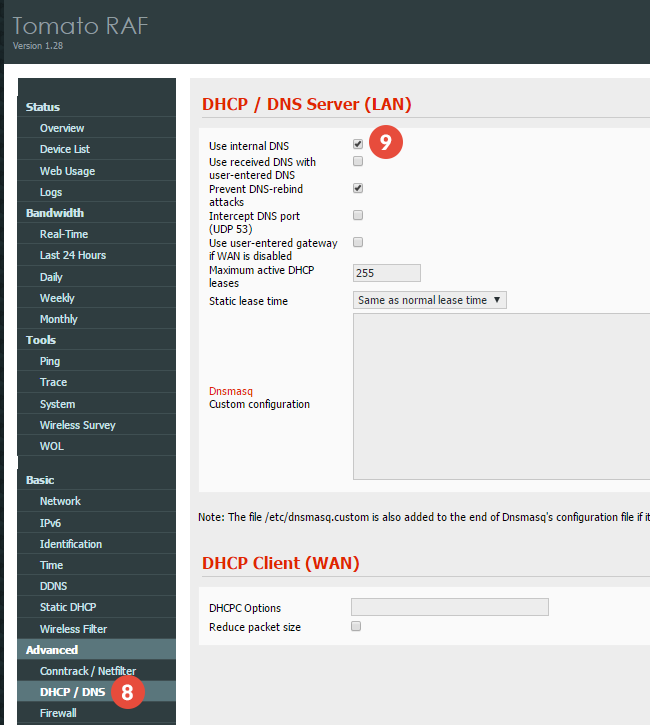
- Go to “Advanced”, “DHCP / DNS” (8).Check the “Use internal DNS” checkbox (9).
Popular tutorials like this
VPN and Smart DNS Services
Protect online privacy, secure your connection and access blocked websites
Try CactusVPN For Free