How to autostart OpenVPN GUI on Windows
Whilst we offer our own program that you can use to connect to any of the protocols we offer the beauty of VPN’s are the choices that you have in order to tailor your experience to the way you want it to be. There are many of us (including myself) that are happy with what OpenVPN has to offer and would like to automate an OpenVPN connection on their PC’s and I am here to tell you how to do just that.
- Follow one of the following tutorials to set up OpenVPN GUI for: Windows 10, Windows 8, Windows 7, Windows Vista, Windows XP.
-
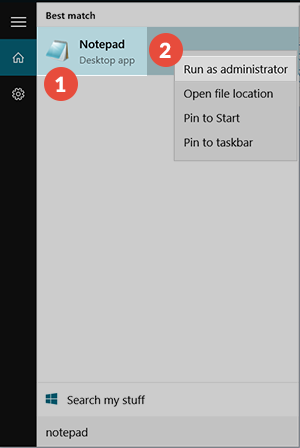
Open Notepad app with administrator rights: Click the Start button and type the word “notepad”. Right click on the Notepad icon (1). Click on “Run as administrator” (2).
-
In the opened txt file, write your username and password one above another (find your username and password in the package details from the Client area).

-
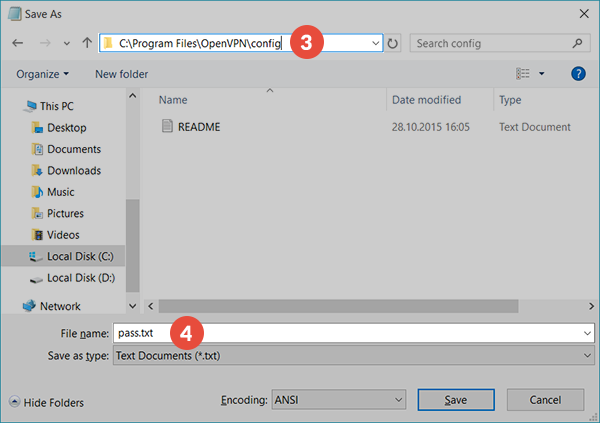
Save the file in your openvpn config dirrectorry (3) with the name pass.txt (4). Don’t close the Notepad app just yet! If you closed it, repeat step 2.
-
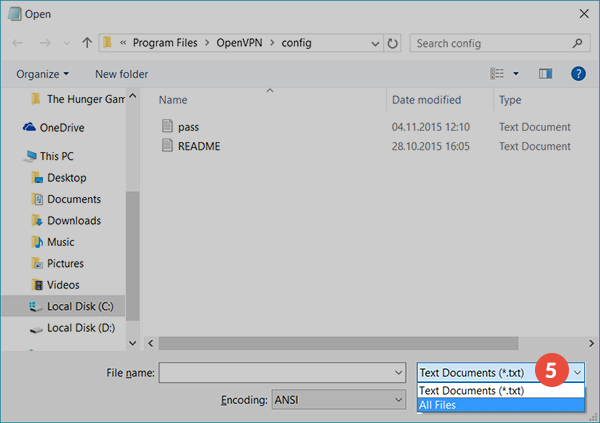
With the Notepad opened with administrator rights, click Ctrl + O, or go to File -> Open… Click on the button from the right of File name box ‘Text Documents (*.txt)’ and select ‘All Files’ (5).
-
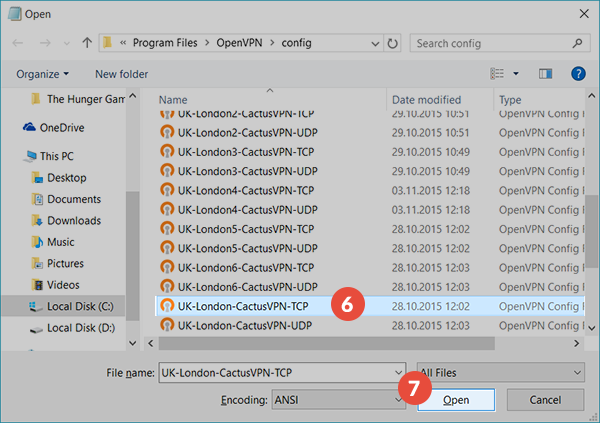
Select the UK-London-CactusVPN-TCP.ovpn file (6) (or any other server or port you prefer) and click the “Open” button (7).
-
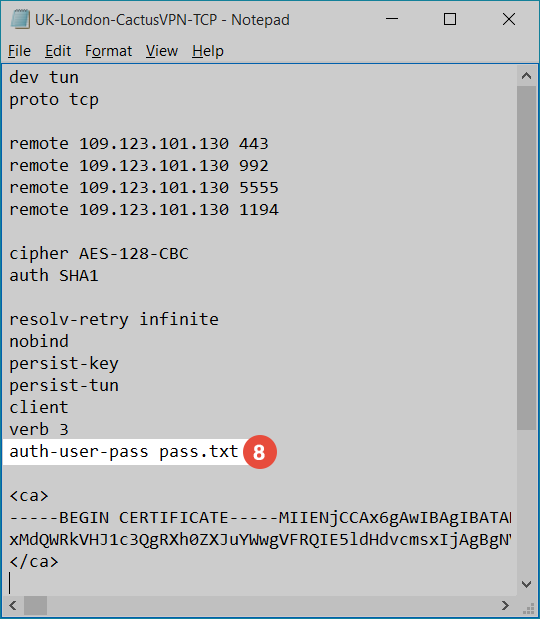
Find the row ‘auth-user-pass’ and type the credentials file name (pass.txt) (8) on the right of it.
-
Save the file and close the Notepad app.
-
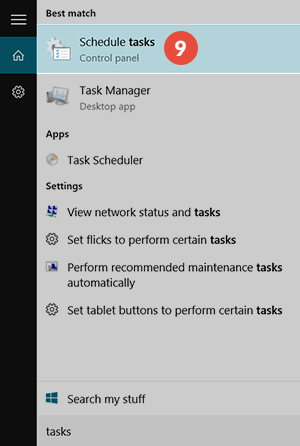
Click the Start button (or open the control panel) and type the word ‘tasks’. Open the Schedule tasks tool (9).
-
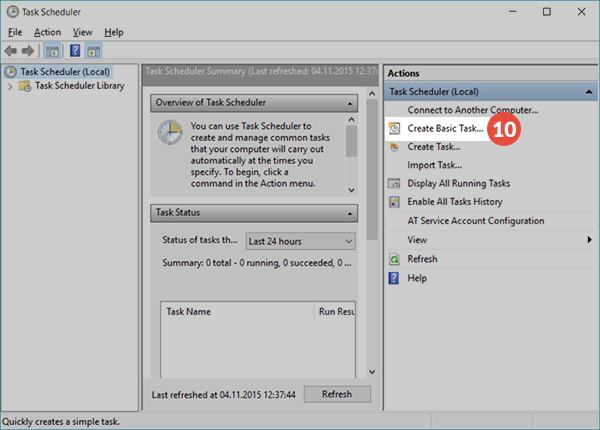
In the ‘Actions’ column, click on the ‘Create Basic Task…’ button (10).
-
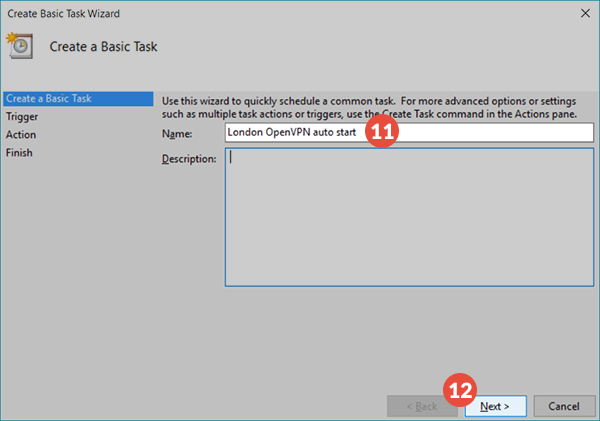
Give the task a name (11), for example ‘London OpenVPN autostart’ or any other (you can also write a Description if you want, this is not mandatory), then click “Next” (12).
-
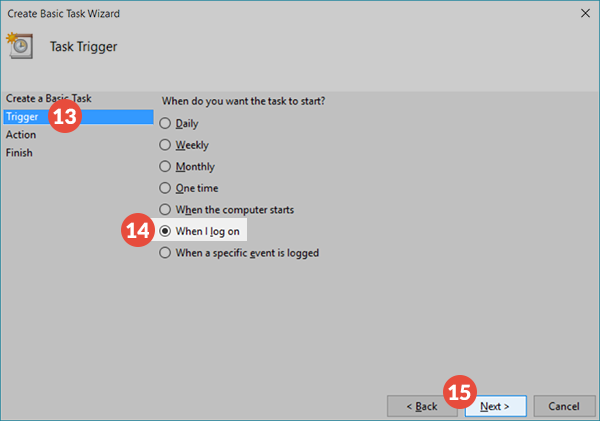
At the “Trigger” settings (13), select ‘When I log on’ (14) then click “Next” (15).
-
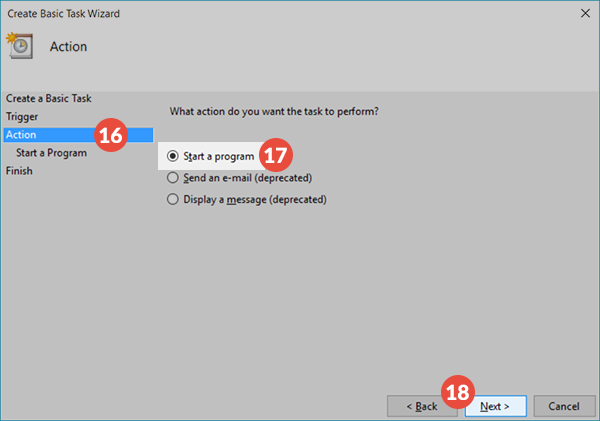
At the “Action” settings (16), select ‘Start a program’ (17) then click “Next” (18).
-
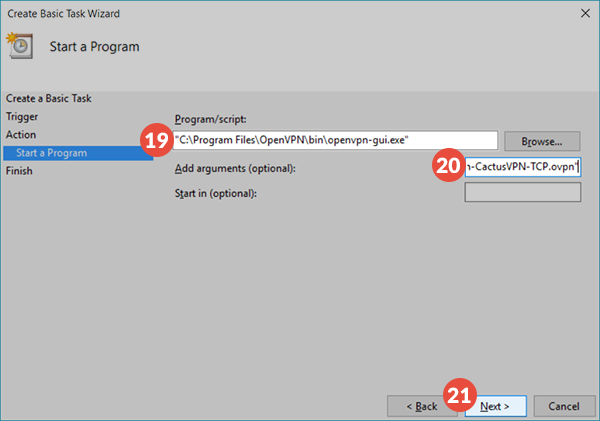
In the “Program/script” field (19) type the full path to your OpenVPN GUI executable or click browse and select it from the folder you have it installed. In the Add arguments field (20), type: --connect “UK-London-CactusVPN-TCP.ovpn” Click Next (21).
-
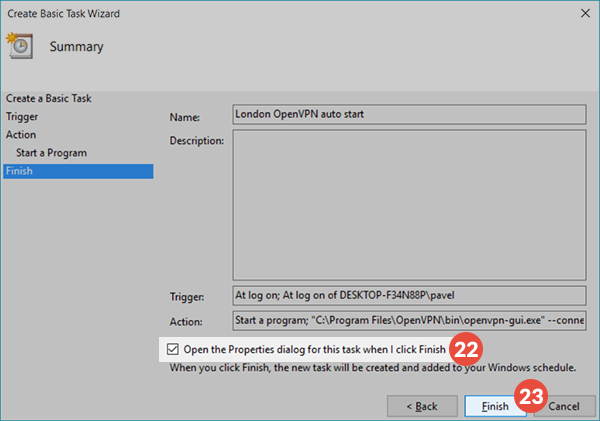
At the “Finish” settings make sure you tickted the ‘Open the Properties dialog for this task when I click Finish’ option (22) and click the “Finish” button (23).
-
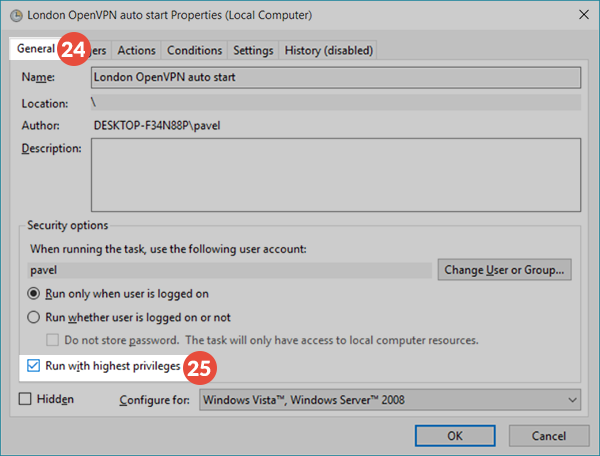
At the “General” properties tab (24), make sure you ticked the ‘Run with highest privileges’ option (25).
-
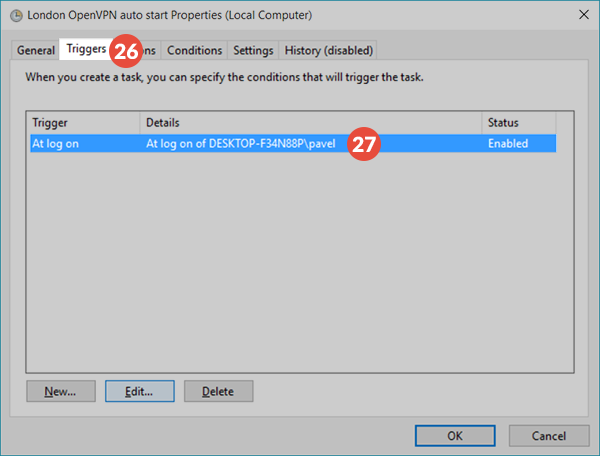
Go to the “Triggers” tab (26) and edit the ‘At log on trigger’ (27).
-
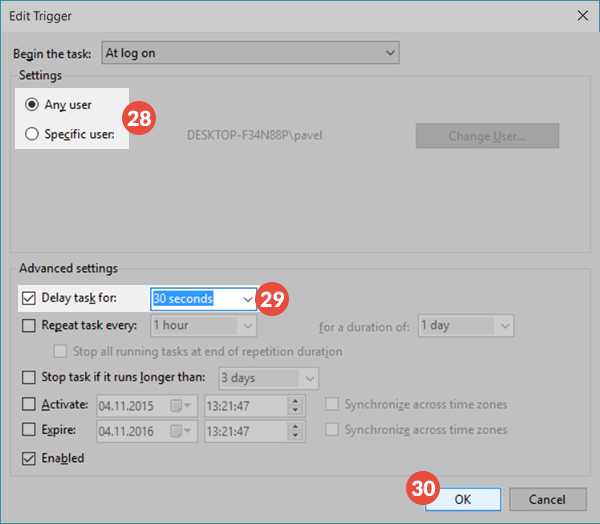
In the “Settings” box select “Any user or a “Specific user” (28). In the “Advanced settings” box check the ‘Delay task for:’ option and select 30 seconds from the dropdown box (29). Click “OK” (30).
-
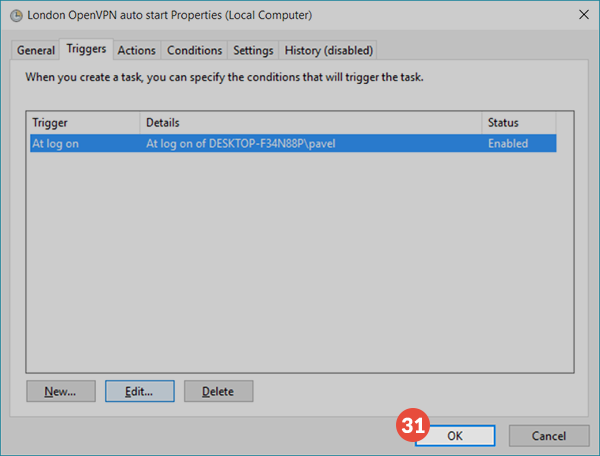
Click “OK” (31).
- Close the task scheduler.
Now you can reboot your PC and OpenVPN should start and connect automatically without you having to do a single thing.
Popular tutorials like this
VPN and Smart DNS Services
Protect online privacy, secure your connection and access blocked websites
Try CactusVPN For Free