How to set up CactusVPN App for Android TV
In this tutorial we will show you how to install and use the CactusVPN app for Android TV and how to connect to VPN and Smart DNS using our app.
First let’s see what are our requirements:
Requirements
In order to use the CactusVPN app you will need:
- A CactusVPN account. If you don’t have one you can try our services for free.
- Your CactusVPN account email address and password to sign in to the app. If you forgot your password, you can reset it here.
Installation
-
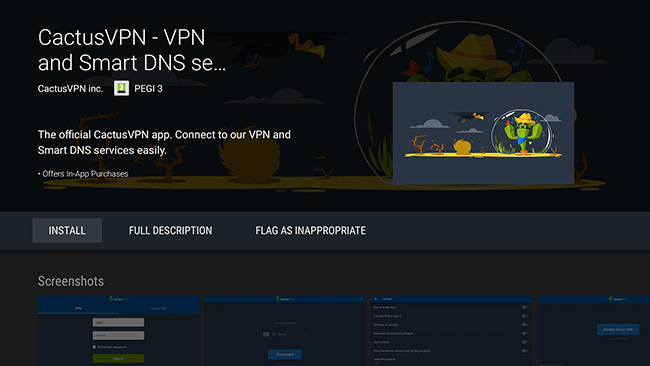
First, you have to install the CactusVPN app for Android TV. You can find it on Google Play Store. Tap on Install.
-
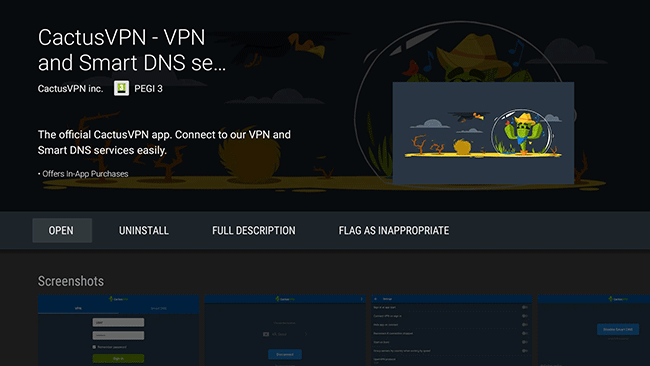
When the installation process is ready open it by taping on Open.
Sign in
-
Type your CactusVPN account email address (1) and password (2).
If you forgot your password, you can reset it here.
Tap on Sign in (3).
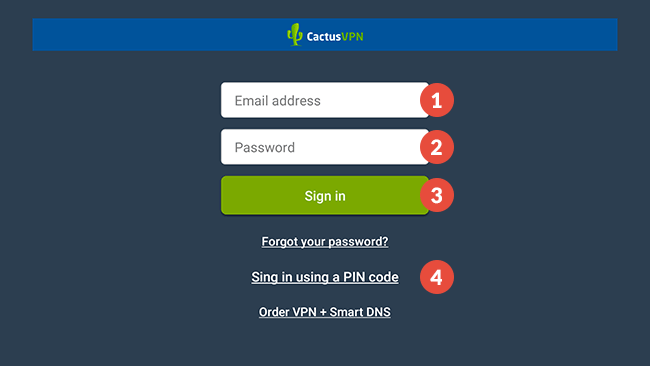
If you are using the CactusVPN app on a TV or on another device where it’s hard to type your username and password then you can sign in using a PIN code. To do this, tap on Sign in using a PIN code (4).
Go to cactusvpn.com/pin/, generate an authentication PIN code and enter it in the PIN code field (5).
Tap on Sign in button (6).
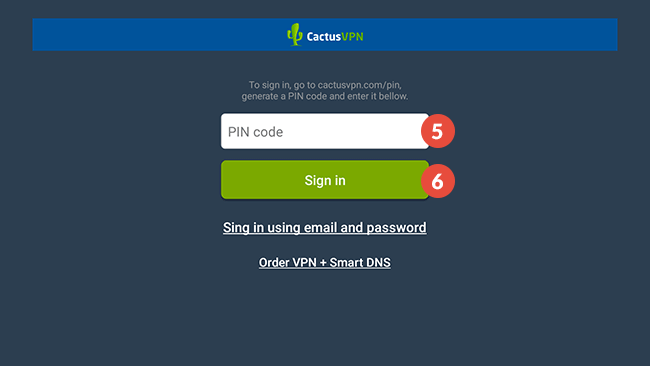
On this screen you can also order our VPN + Smart DNS service if you still don’t have one.
-
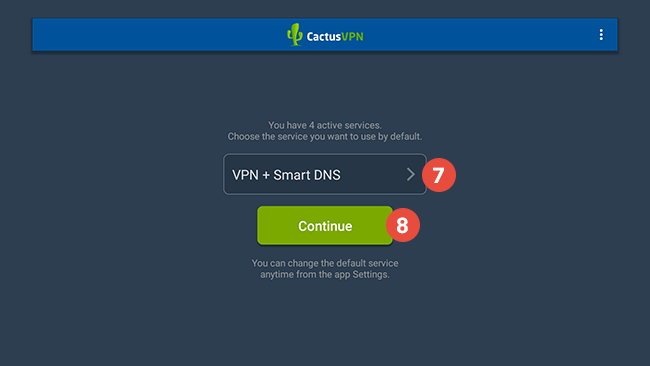
If you have more than one active CactusVPN subscriptions, you will be asked to choose the subscription you want to use by default. Select the subscription (7) and click on Continue (8).
This will happen only once. You can change the default service anytime from the app Settings.
Connect to VPN
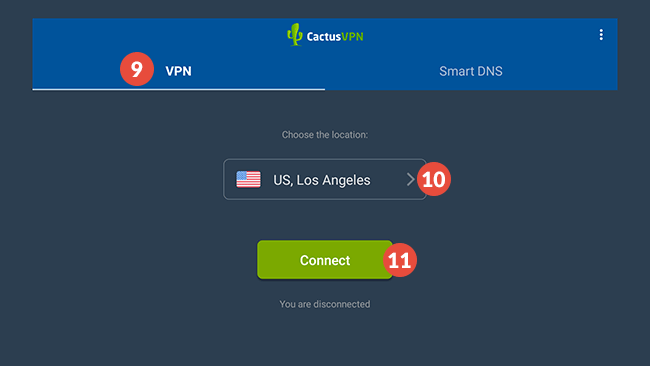
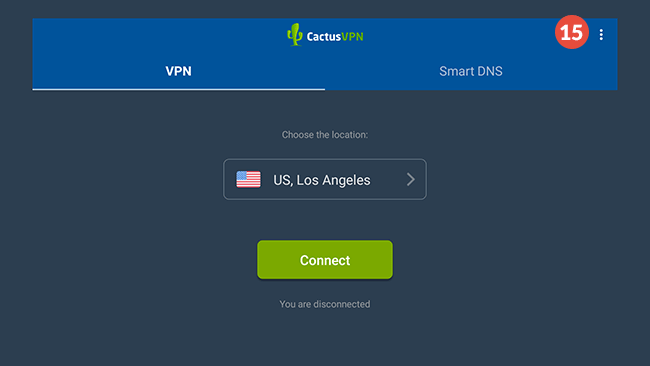
To connect to VPN, make sure the VPN tab (9) is selected.
Select the VPN server location (10) you want to connect to then tap on Connect button (11).
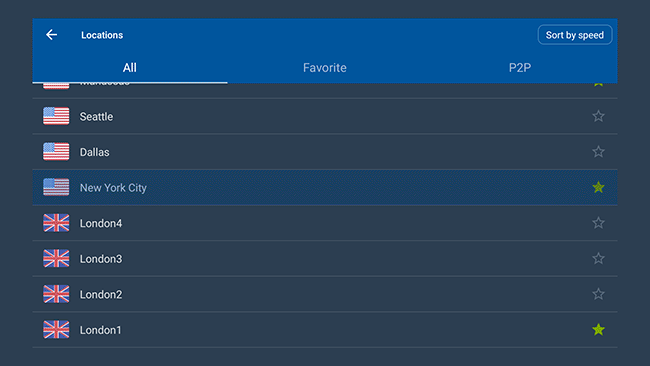
When you choose the VPN server location, you have the possibility to:
- Find the fastest servers for you. Tap on Sort by speed and the servers will be sorted by the lowest ping to your computer.
- Add your preferred VPN servers to favorites and to filter servers by different criteria.
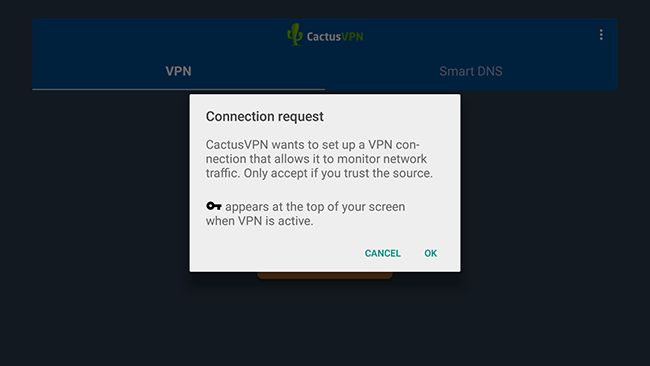
You might be asked if you trust the application. Tap on OK.
In several seconds the app does its job and VPN connection on your Android device will be created and you’ll see the You are connected message below the button – this means your connection is now active. To disconnect just tap on “Disconnect” button).
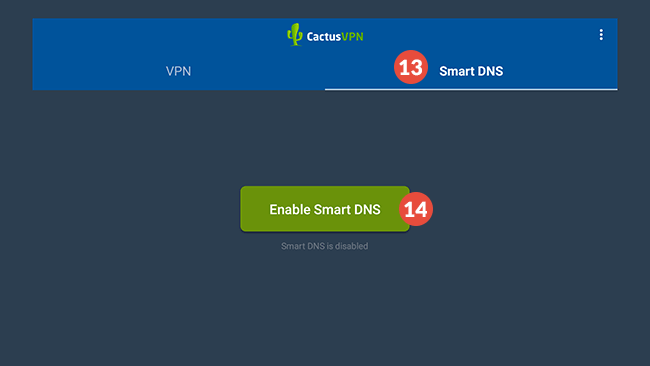
Connect to Smart DNS
To connect to Smart DNS, make sure the Smart DNS tab (13) is selected.
Click the Enable Smart DNS button (14).
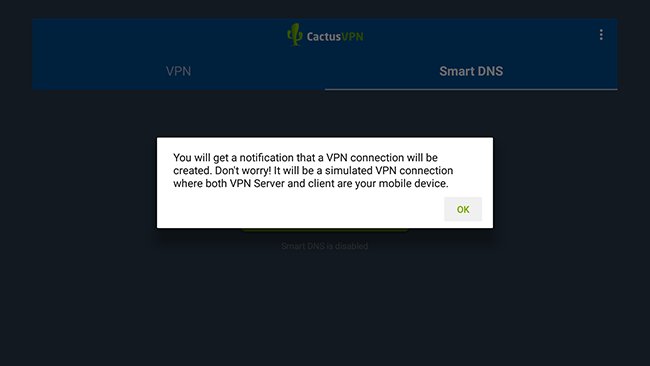
You will get a notification that our app is trying to create a VPN connection. Don’t worry! It will be a simulated VPN connection where both VPN server and client are your mobile device. We use it so you could have Smart DNS access regardless if you are connected to Wi-Fi or using mobile data.
Tap OK.
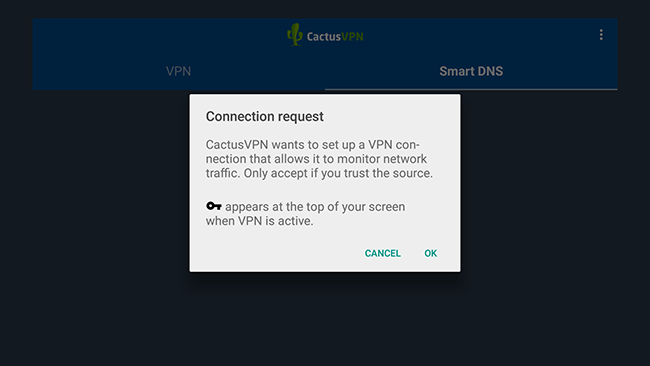
Then tap OK again.
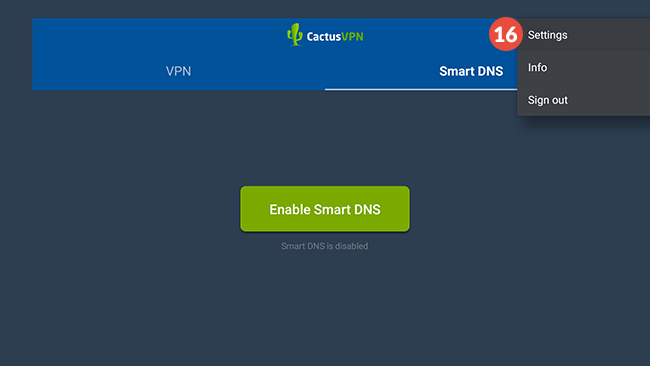
Settings
You can configure how the app works. To do that tap on menu icon (15).
Tap on Settings (16).
CactusVPN Account
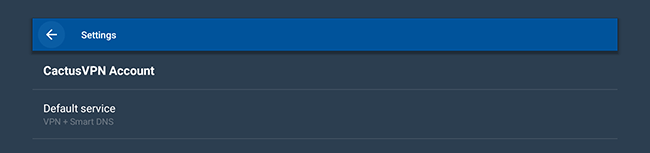
Default Service – You will see this option only if you have more than one active CactusVPN subscriptions. Here you can choose the subscription you want to use by default.
VPN
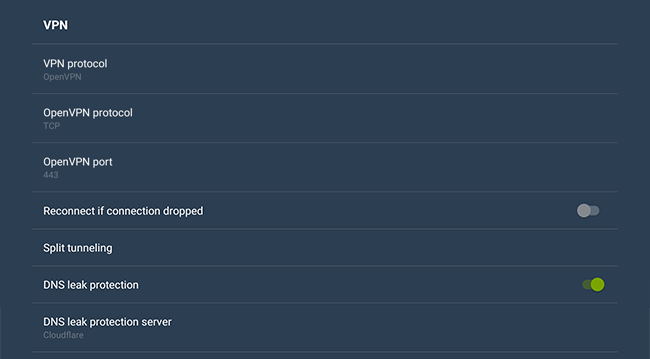
VPN Protocol – choose the VPN protocol your want to use – OpenVPN or WireGuard. (What protocol should I use?)
If you choose OpenVPN, you can also set:
OpenVPN protocol – choose the OpenVPN protocol you want to use: TCP or UDP.
OpenVPN port – choose the OpenVPN port you want to use.
Reconnect if connection dropped – automatically reconnect if connection is dropped.
Split tunneling – Choose which of your apps will connect to the Internet via VPN and which will connect directly when your device is connected to CactusVPN.
DNS leak protection – turn on or off the DNS leak protection (What is DNS leak protection?).
If DNS leak protection is turned on, you’ll be able to choose which DNS servers you want to use: CactusVPN, Cloudflare, OpenDNS or Google Public DNS servers.
Split Tunneling
Using this feature you can choose which of your apps will connect to the Internet via VPN and which will connect directly when your device is connected to CactusVPN.
To configure the split tunneling, tap on Split tunneling.
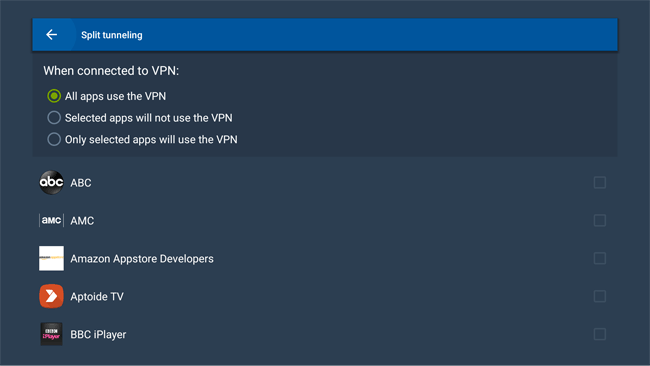
On the Split tunneling screen, you will see a list of apps installed on your device and 3 options:
- All apps use the VPN – all apps will connect to the Internet via VPN when your device is connected to CactusVPN.
- Selected apps will not use the VPN – all the selected apps will connect to the Internet directly, without going through the VPN tunnel when your device is connected to CactusVPN.
- Only selected apps will use the VPN – only selected apps will connect to the Internet via VPN when your device is connected to CactusVPN.
Smart DNS
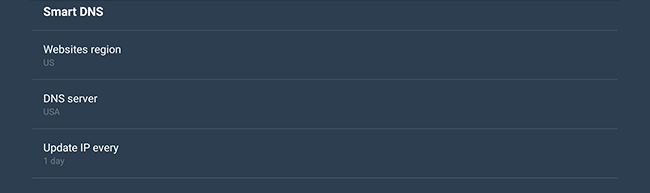
Websites region – choose the region that will be used for multi-regional websites.
DNS Server – choose the one that is closest to you.
Update IP address every – set up how often your IP will be automatically updated. That’s useful when you ISP often changes your IP address.
General
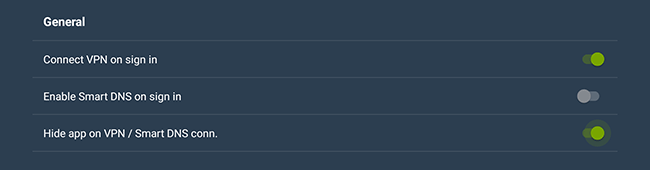
Connect VPN on sign in – automatically connect to VPN using the last used city and protocol after signing in.
Enable Smart DNS on sign in – automatically enable Smart DNS after signing in.
Hide app on VPN / Smart DNS conn. – hide the CactusVPN app after connecting to VPN or enabling Smart DNS.
Popular tutorials like this
VPN and Smart DNS Services
Protect online privacy, secure your connection and access blocked websites
Try CactusVPN For Free