How to Set Up Proxy on Vuze
In this tutorial we will show you how to set up Proxy on Vuze but first let’s see what are our requirements.
Requirements
In order to set up the Proxy on Windows you will need:
- A CactusVPN account. If you don’t have one you can try our services for free.
- Your Proxy username, password and Proxy server address. You can find them in your account on our website, by going to Settings.
Go step-by-step through following instructions:
- Open Vuze.
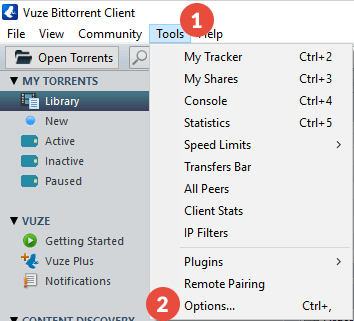
- Go to “Tools” (1) and then to “Options” (2).
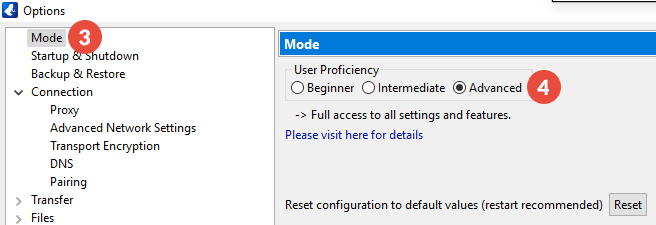
- Go to “Mode” (3) and tick the “Advanced” box (4).
- Expand “Connection” and select “Proxy” (5).
Tick the “Enable proxying of tracker communications” and the “I have a SOCKS proxy” boxes (6).
In the “Host” field (7) enter the IP address of the proxy server you want to use and in the “Port” field (7) enter 1080.
You can find them in your account on our website, by going to Settings.
Important! Make sure you use only the P2P-enabled servers marked with ✓ in the “P2P” column from the list of available servers.
Type your VPN username and password (8). You can find them in your account on our website, by going to Settings. Make sure you use your VPN username and password and NOT the website account credentials (What is the difference?).
Tick the “Enable proxying of peer communications (outgoing connections only)” box (9).
Choose “V5” in the “SOCKS version” drop-down menu (10).
Tick the “Use same proxy settings for tracker and peer communications proxy” box (11).
Click on “Save” (12).
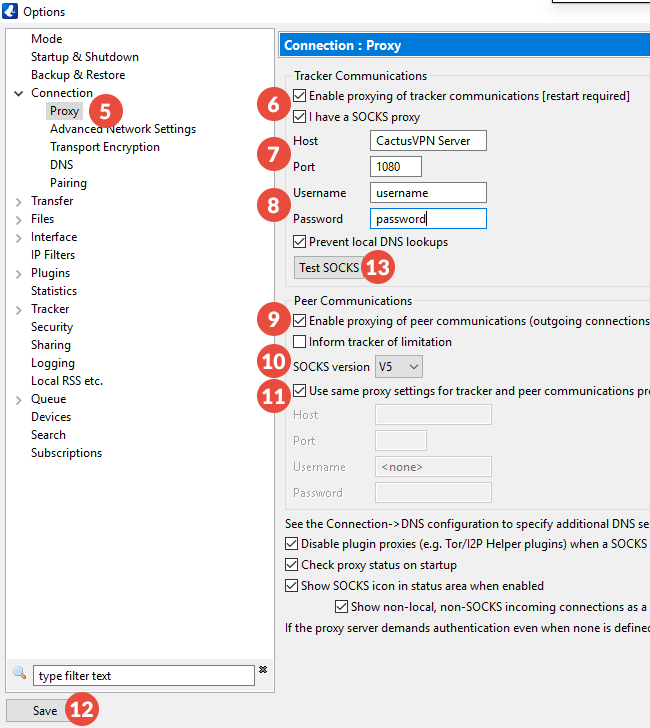
- To check whether it really works, click on the “Test SOCKS” button (13).
Popular tutorials like this
VPN and Smart DNS Services
Protect online privacy, secure your connection and access blocked websites
Try CactusVPN For Free